- 修改配置文件 /etc/ssh/sshd_config
Protocol 2 # 只启用SSH V2版本的协议
PubkeyAuthentication yes # Public Key 验证开启
AuthorizedKeysFile .ssh/authorized_keys
# Public Key 文件路径;
# 在使用的时候,会根据登陆用户的主目录参数,在前面添加到定义的目录前
# 即: 当登陆的用户为【ysp】时,此文件路径为:/home/ysp/.ssh/authorized_keys
PasswordAuthentication no # 关闭密码认证 - 修正目录权限:chmod -R 700 .ssh # 手动创建此目录时,需要特别注意
- 修正authorized_keys权限: chmod 600 authorized_keys
- 重启sshd服务并查看状态: systemctl restart sshd; sleep 3; systemctl status sshd
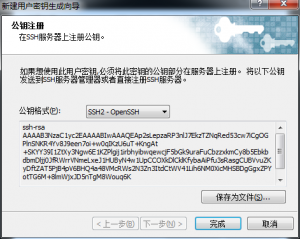
- 工具使用的为【xshell】其生成相应的 public key 方法如下:

生成用户公钥,都直接下一下,下一步,并设置好密码和文件名 
显示的公钥,此公钥需要配置到登陆的用户主目录下AuthorizedKeysFile中路径的文件里面 - 在生成最后一步时,会显示【公钥】并提示你是不保存为文件,
此时生成的公钥要写入到上面的Public key 文件路径,在登陆的时候会去验证
SSH密钥配置文件与内容